
Setting Up a WebDriverIO Project With JS & TS
Step-by-Step Guide to Creating a WDIO Project using JavaScript and TypeScript
In today’s fast-paced software development landscape, automation testing has become an essential part of the quality assurance process. When it comes to testing web applications, WebDriverIO(WDIO) has emerged as a popular choice among developers and testers due to its robust features and user-friendly API. It provides a set of easy-to-understand and intuitive methods and commands that developers and testers can use to interact with elements and perform actions on applications. By streamlining the process of automating web tests, WebDriverIO has become a preferred choice in the industry.
Setting up a well-configured WebDriverIO (WDIO) project is crucial as it forms the foundation for effectively executing tests without encountering unnecessary hurdles. In this blog, I will guide you through the step-by-step process of setting up a WebDriverIO project for both JavaScript (JS) and TypeScript (TS).
So without further ado, let’s begin.
Prerequisites:
To set up a WDIO project, you need:
- Node.js & npm installed on your system
- Java installed and its Environment Variables set up
- Code Editor like VS Code or IntelliJ
TypeScript Project Setup:
Now, the first step we need to do is initialize WDIO in our project directory. For this, fire up your code editor and in console, type;
npm init wdio .By executing this command in your console, WebDriverIO will be initialized in the current folder. It will automatically download the WebDriverIO Command Line Interface (CLI) and trigger a configuration wizard to assist you in setting up your project’s configuration. If you want to set up the project in some other place, you have to give its path in the command like this;
npm init wdio ./path/to/new/projectOnce you run this command, a wizard like this will launch in your console;

You can select options like which kind of application you want to test(Web or Mobile), which browsers you want to run tests on (Chrome, Safari, etc.) according to your requirements and WebDriverIO will install the necessary libraries and addons for it.
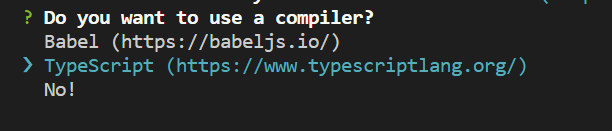
In order to write your scripts in TypeScript, you have to select it in the following question;

Once you have selected all the necessary options, the wizards will look almost like this (depending on the options you selected);

For the last question (“Do you want me to run `npm install`”), type ‘Y’ so that the wizard triggers installation process to load all the required libraries.
And with that, the configuration is complete and you have set up your first WDIO project. If you followed the above configurations, you will have an autogenerated test file which you can run to make sure that your project is working fine. For that, run the following command and your test script will start executing;
npx wdio wdio.conf.ts
However, sometimes you can face some issues in the execution of tests or get some errors in the code which can be a little confusing. Mostly, these are related to compiler configurations in ‘tsconfig.json’ file which can be resolved by adding or removing some key value pairs. Through some exploration and trials, I have found these values to be working well.
{
    "compilerOptions": {
        "moduleResolution": "node",
        "module": "CommonJS",
        "target": "ES6",
        "types": [
            "node",
            "@wdio/globals/types",
            "expect-webdriverio",
            "@wdio/cucumber-framework",
            "@wdio/selenium-standalone-service"
        ],
        "noImplicitAny": false,
        "noEmit": true,
        "allowImportingTsExtensions": true,
        "resolveJsonModule": true,
        "esModuleInterop": true,
        "isolatedModules": true,
        "strict": true,
        "noUnusedLocals": true,
        "noUnusedParameters": true,
        "noFallthroughCasesInSwitch": true
    },

}
This combination of values ensures that we face no issues in importing/exporting the modules as well as the JSON objects we need and using the latest features of TypeScript. You can learn more about them from here. So, if you are facing any issues with the compiler, you can paste these key value pairs in your file and hopefully it will work for you!
With that out of the way, let’s move on and see how we can set up the same project but with JavaScript.
JavaScript Project Setup:
Now before we get into the details, one thing I would like to recommend is that if you want to set up a WDIO project with JavaScript as programming language, use the latest version of WDIO which is version 8. The reason for this is that there have been reports of issues with compiler configurations in earlier versions, which could lead to unwanted troubles. The command which I mentioned earlier installs the latest version, so you should use that when creating your project.
Now, as far as the steps for setting up the project go, they are pretty much the same as the ones we discussed for TypeScript except for one thing. In the question for the compiler options in Wizard as mentioned in the above image, you have to choose Babel as compiler. Babel is an open-source compiler for JavaScript which is integrated with WebDriverIO to compile and execute your JS code. Other than this, all of the selections will remain pretty much the same. Just select those options, run npm install and your project will be set up and ready to go.


You can run the same command to run your tests for a JS project as well.
Installing an Older version of WDIO:
The above mentioned commands we used to set up the project initialize the latest version of WDIO. However, if you need to install a previous version for some reasons, you will need to install the CLI manually first and then configure the project. For this, run the following command in your console;
npm install @wdio/cli@versionThis will install the WDIO CLI in the root directory. After that, run the following command;
npx wdio configA configuration wizard like the one mentioned previously will start and you can configure your project with it. From here, it is exactly the same process as the one we have gone through.
Conclusion:
By following these steps, you are now ready to embark on an exciting journey of web automation with WebDriverIO using JavaScript and TypeScript. There are some other ways as well for configuring a WDIO project which can be found in its documentation, but this is the most effective and straight-forward method which in my opinion makes the process a lot easier.
I hope you find this article helpful in setting up your project so you can delve deeper in the world of WebDriverIO. Happy testing!!
